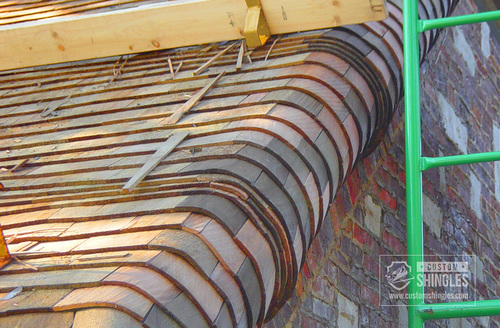
A cedar roof is a beautiful, durable and unique roofing material that requires special care to ensure it lasts. You need to give your wood roof the routine maintenance it needs from the moment it is installed.
If you are planning to install or repair your cedar roof yourself, you want to make sure you are doing it properly. Here are a few common cedar roofing mistakes and how to avoid them.
Did You Allow the Wood to Acclimate?
After your cedar wood shingles or shakes are delivered to your home, you are probably eager to begin the installation as soon as possible. However, doing so could cause more harm than good.
A characteristic of natural wood shingles and shakes is that they change shape as the climate changes. The shingles expand and contract depending on the weather. If you install the shingles too soon, these changes in their shape can damage them. After your shingles are delivered, you need to give them some time to get accustomed to the climate to avoid that from happening.
How Did You Install the Nails?
The type of nails you use and the method you use to install them could also lead to you unknowingly damaging your roof.
If you are installing your roof yourself, we recommend that you use stainless steel, galvanized or aluminum nails that are two inches long. And, if you live in a coastal climate, it is imperative to select nails of a specific alloy, depending on your home's distance from the ocean. Finally, using nails with ring shanks will help keep them in place as the shingles expand and contract.
It's also important that you install the nails by hand — using a nail gun will force the nails too deep into the shingles, damaging them and lessening their lifespan. Instead, install two nails that are four inches from the top of the shingle and one inch from both sides into each shingle.
Were the Shingles Aligned Correctly?
If your shingles are installed too close together, their changing shape could easily damage them. On the other hand, if they are installed too far apart, it would allow precipitation and other debris to slip in between the spaces.
While you are installing your cedar shingles, start at the bottom of the roof. For the first row, the shingles should extend about an inch and a half over the edge of the roof to allow runoff to avoid the sides of your home and should have the thick end of the shingle at the top. After the first row, the thick end of the shingle should be at the bottom. Nail each shingle about a quarter-inch apart.
Are Your Shingles Ventilated?
Because wood naturally absorbs water easily, cedar shingles and shakes need room to breathe. Properly ventilating your roof will keep the shingles at the proper temperature and benefit your roof and home in other ways, too. Installing a cold roof system will keep your cedar roof ventilated and healthy. The system is made up of several different parts that all work together to keep a balanced temperature.
If you are concerned about installing your new cedar shingles or shakes yourself, put your trust in a professional. At Custom Shingles, we are your local cedar roofing company that can take on any job — cedar roof repair and maintenance as well as installation. Contact us today to schedule a maintenance appointment or to request a free estimate.

